A Custom MIDI Controller Based On OpenDeck
After dismantling my 2003 MIDIBox I wanted to build a successor controller for my Live Set. This time, it needed to be more simplistic and it should come in a synthesizer-style layout, with at least 8 groups of LED-lit buttons and two potentiometers each – I don't like the haptics of encoders while performing. I wanted it to be as versatile as possible with a small footprint of 20x20x5cm maximum.
The controller I chose to build is based on the OpenDeck MIDI Platform, which runs an open source firmware on manifold microcontroller boards. I picked the Raspberry Pi Pico because it is very small and comes with three 12bit ADCs for analog inputs. OpenDeck has great support for many input/output configurations, including RGB LED support with brightness and blink modes.
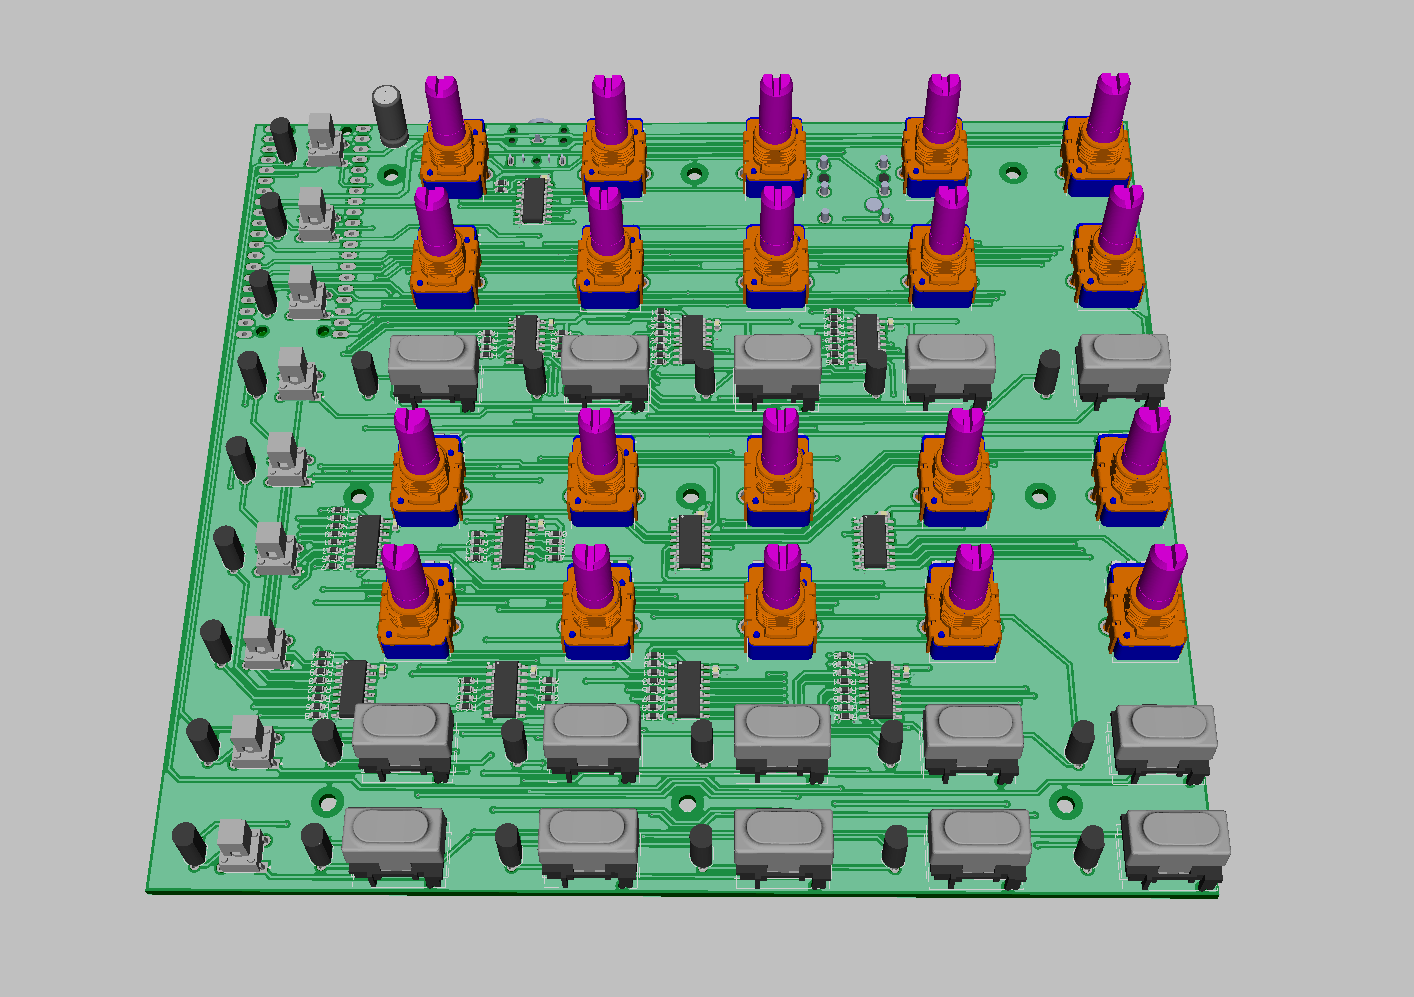
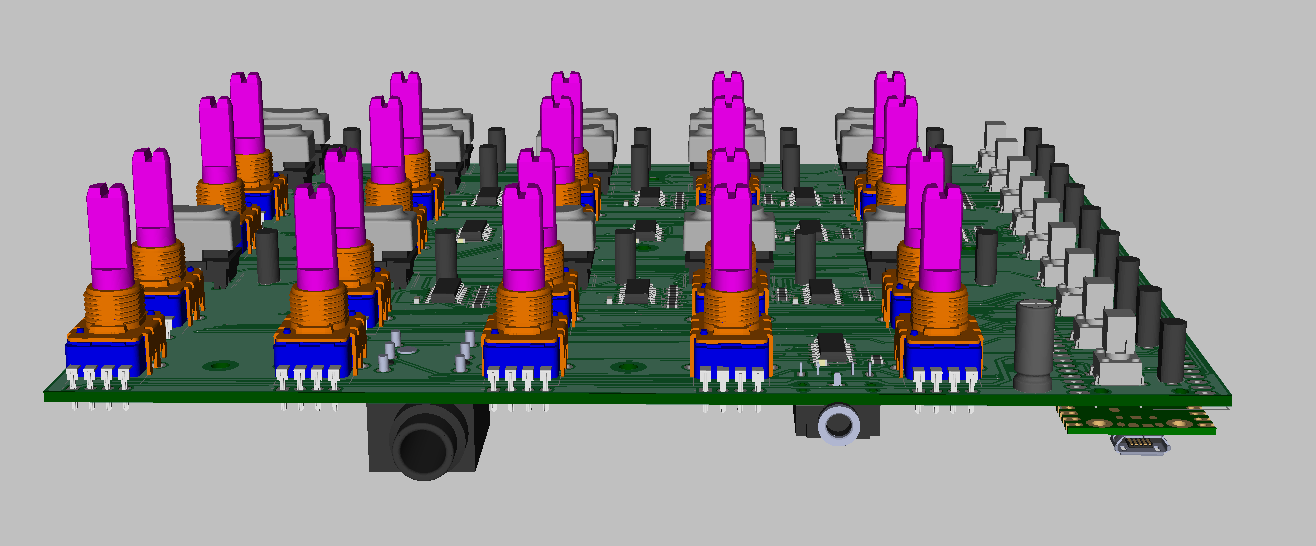
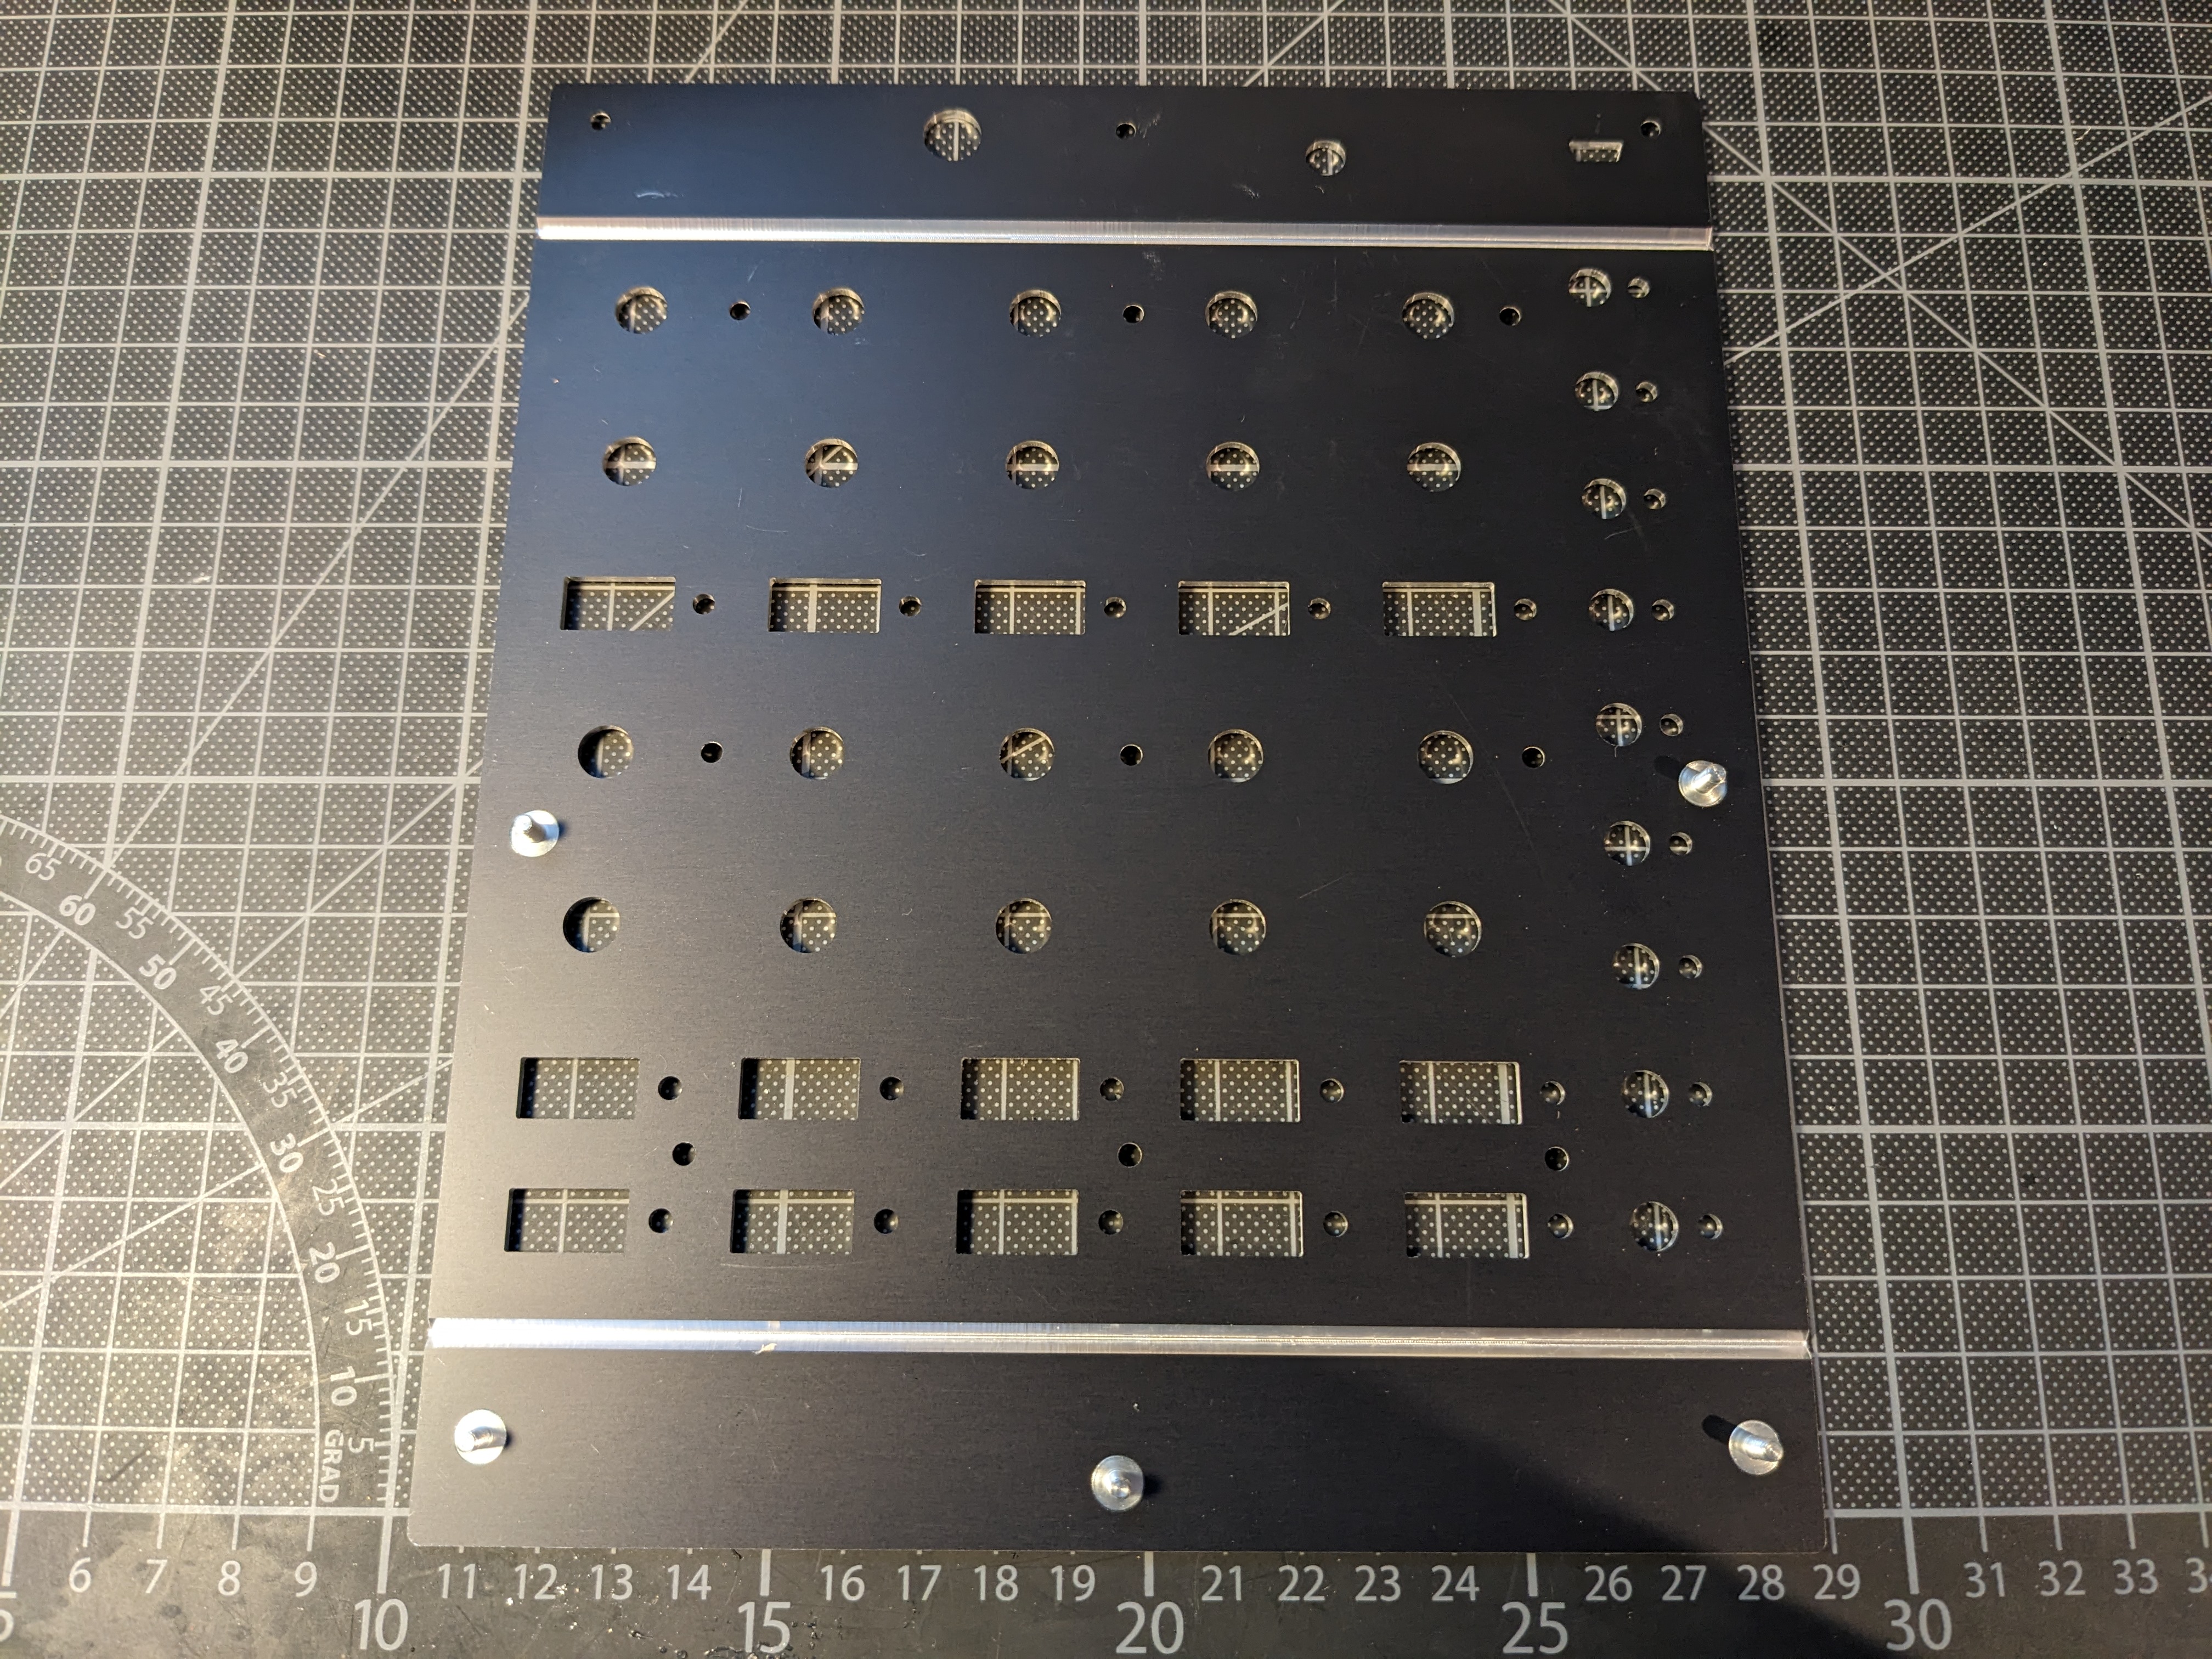
I made my own PCB design in DipTrace to fit the Raspberry Pi Board with all components and connectors. The sketch for the front panel was done in Inkscape. I was able to include within the design 20 potentiometers (ALPS RK11K), 24 tactile key switches (Marquardt 6450 and Omron B3F), red-green bicolor LEDs (Kingbright WP115) for each button, MIDI out and footswitch connectors. The analog inputs are connected using three 74HC5041 multiplexers, digital inputs use 74HC165 parallel shift registers and outputs use 74HC595 serial shift registers. I'm running the LEDs at very low current (<5mA) to make sure I'm not exceeding the RPi 300mA limit when all 48 channels are lit at the same time. Have a look at my preview renderings:

DIY Prototyping with the Pizza Oven
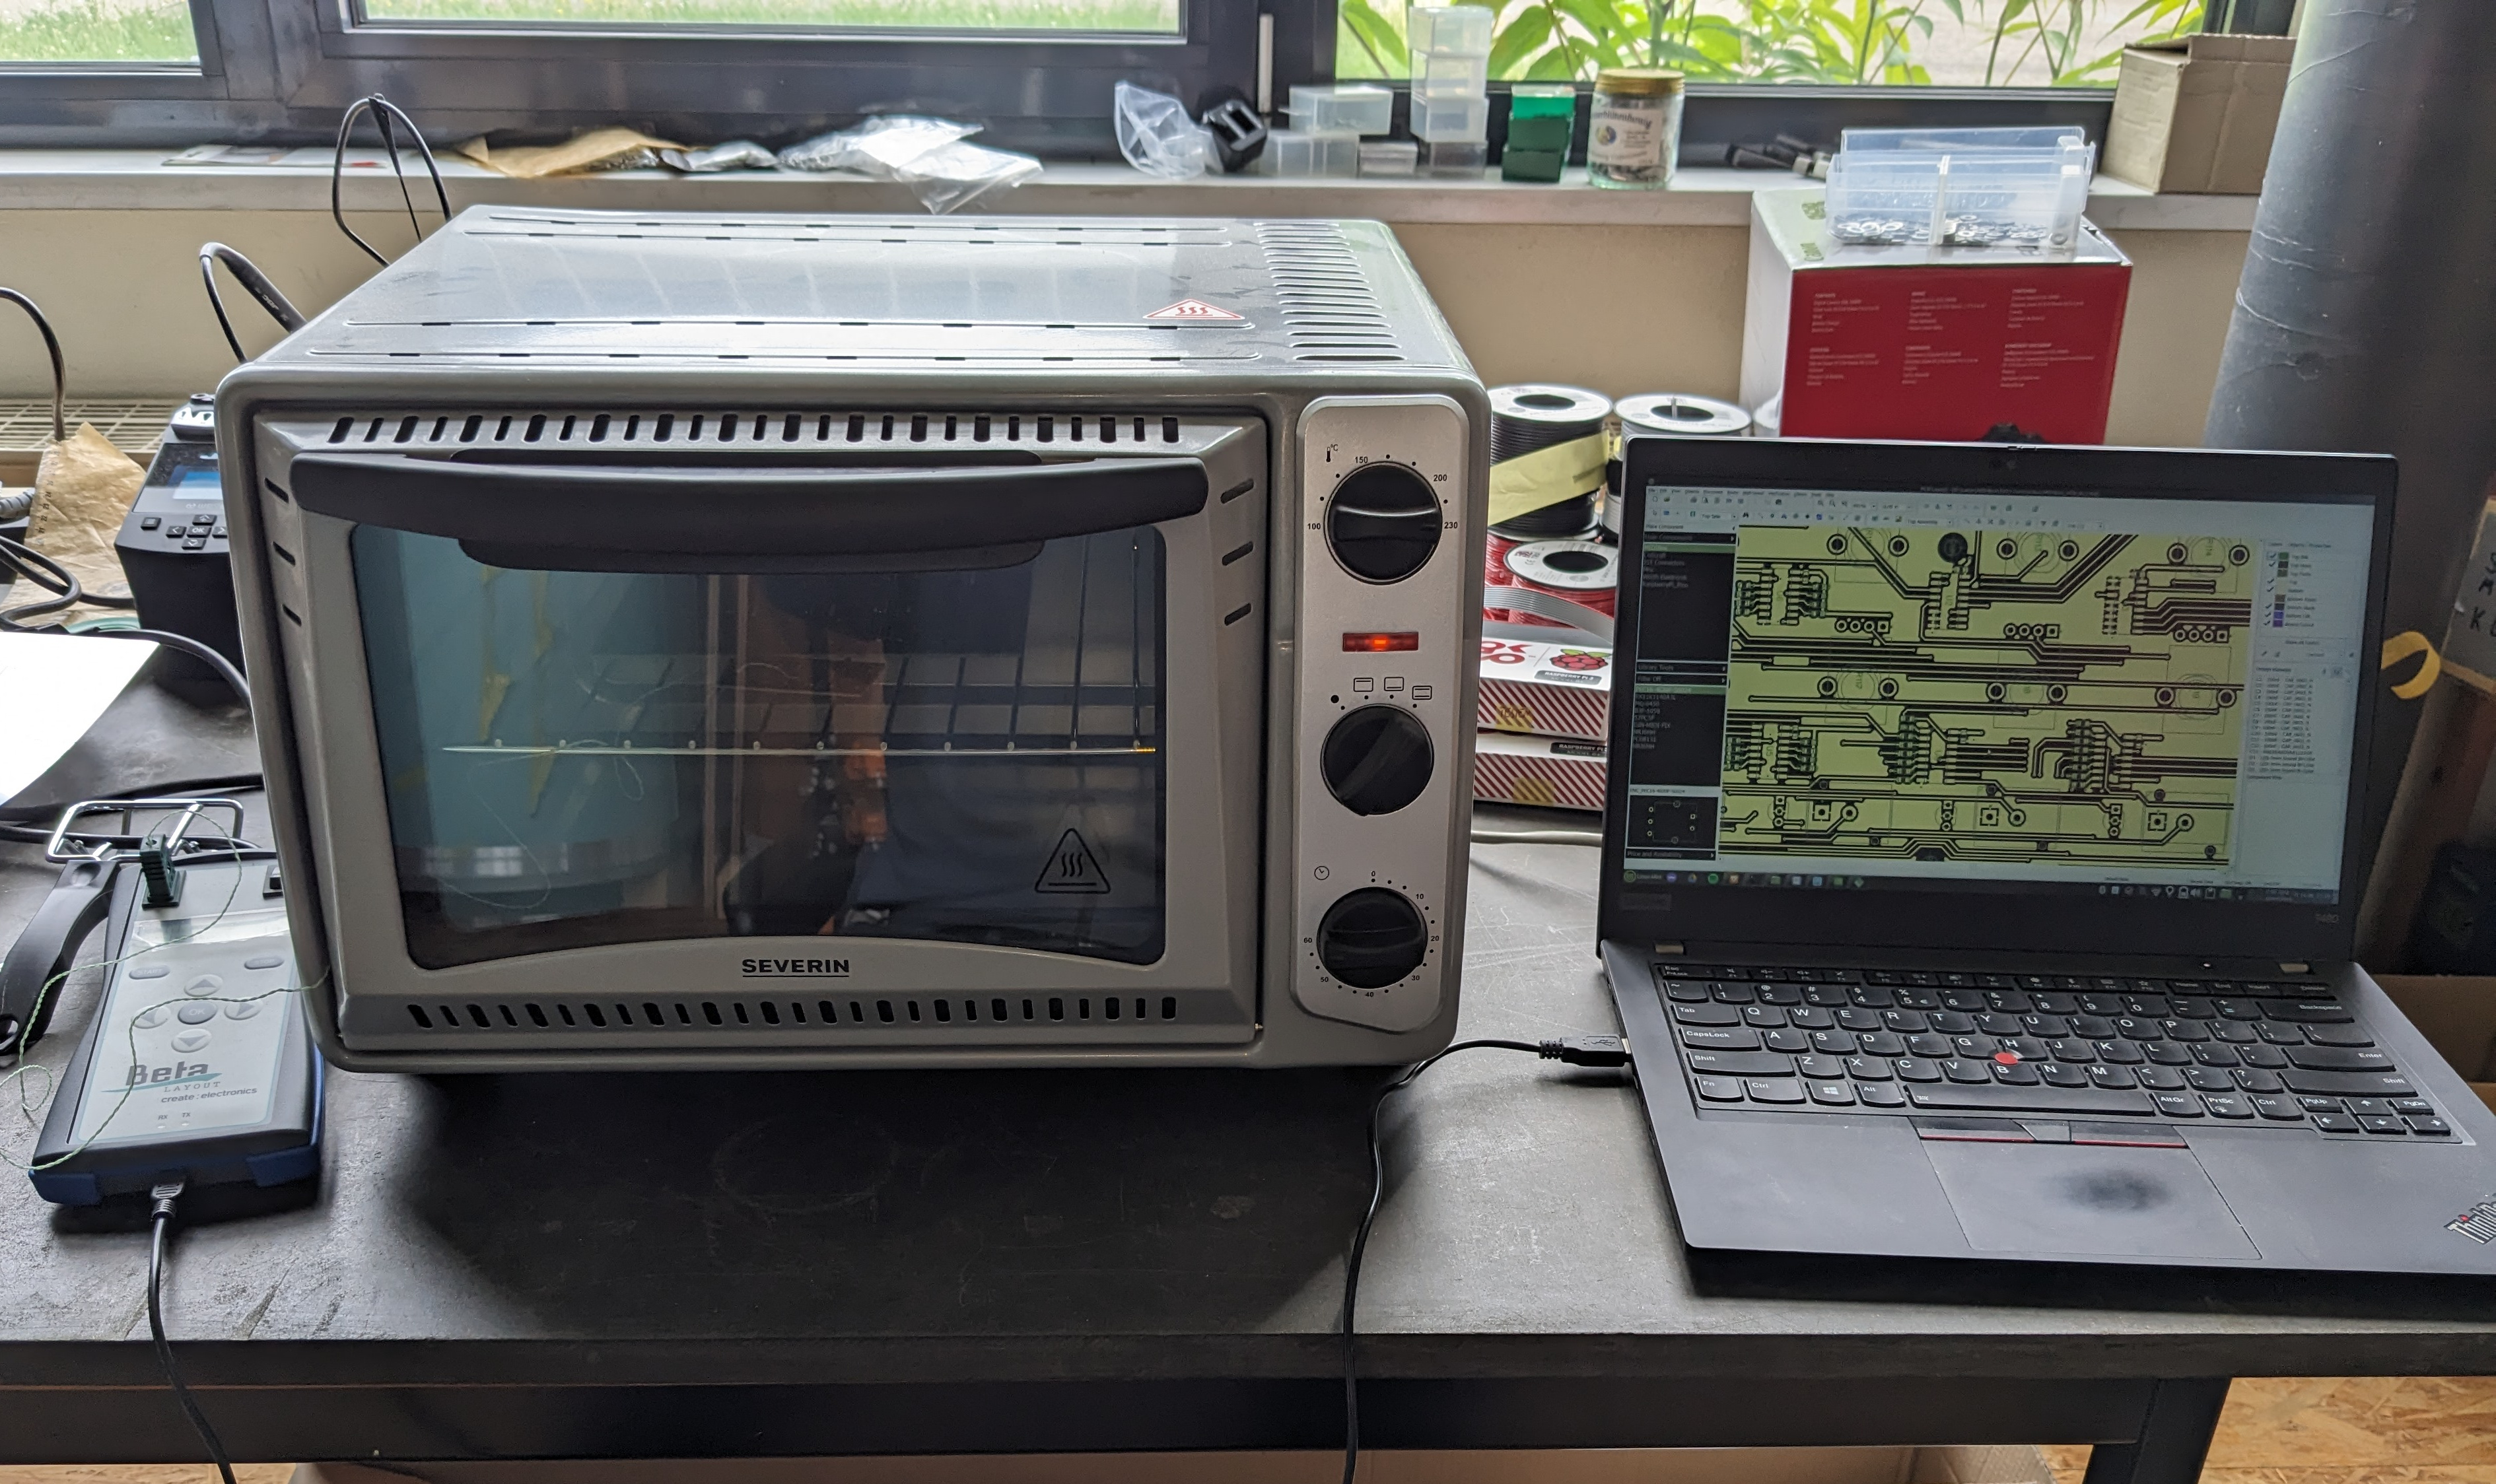
I ordered the PCB at Beta Layout and did the SMD component soldering using the Beta Layout Reflow Kit. This kit is basically a low-cost consumer pizza oven [sic!] with a modified temperature control, so it can match the temperature curve needed for reflow soldering. The result was very satisfying, and I didn't need to do any manual corrections. The THT components were soldered manually, and you can imagine it took me quite some time to get the LEDs sit at the right height.


Frontpanel and Aluminium Enclosure
The most challenging part was to find a compact and robust housing that fits my size requirements and is not too expensive to build as a prototype from ground up. I found the U-housing script for the Schaeffer AG Frontpanel Designer, which generates a template for two aluminium plates that can be bent and mounted into a 6-sided box. I transferred my front panel design from Inkscape and needed to take care of overlapping components on the PCB with the mounting brackets. In the end, I found this to be the most cost efficient way and it still looks very professional.
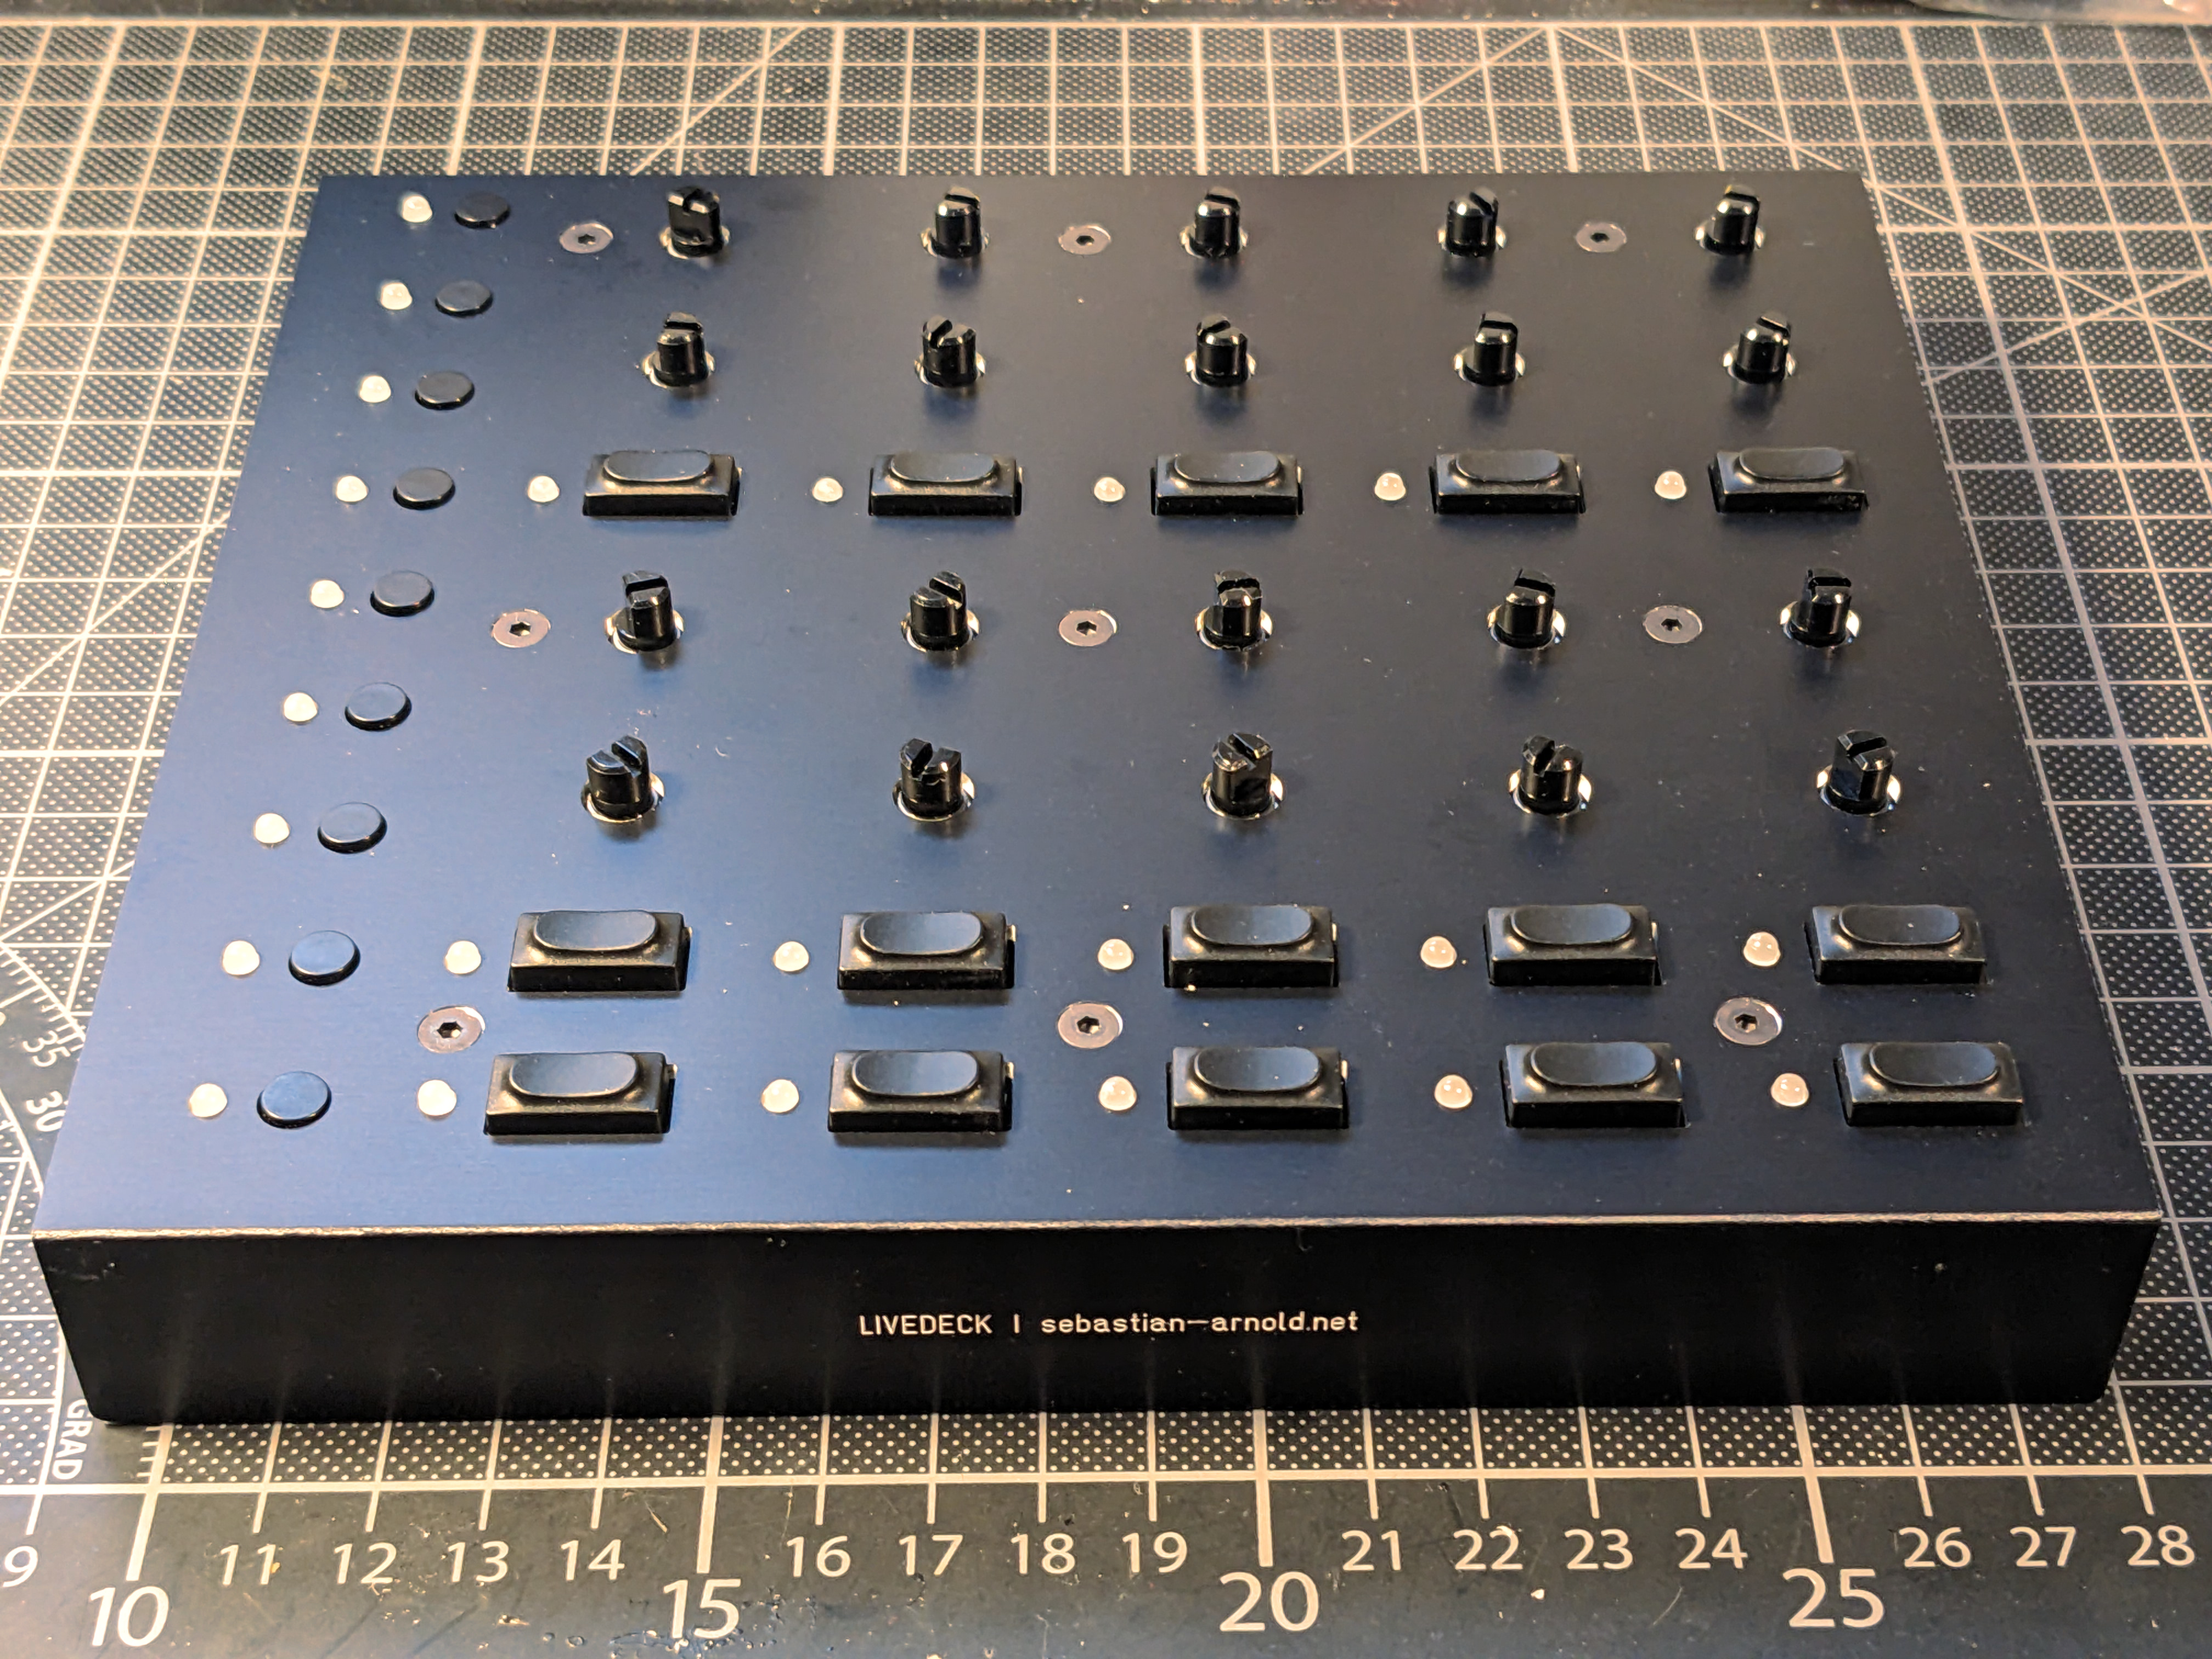
Instead of the intended engravings I chose to leave the panel blank, to keep the function assignments flexible and manufacturing costs low. I'm now using a Phomemo P12 Label Maker to print removable labels, which is especially easy with the browser-based Open Source Phomymo Editor.
How I'm Using It Today
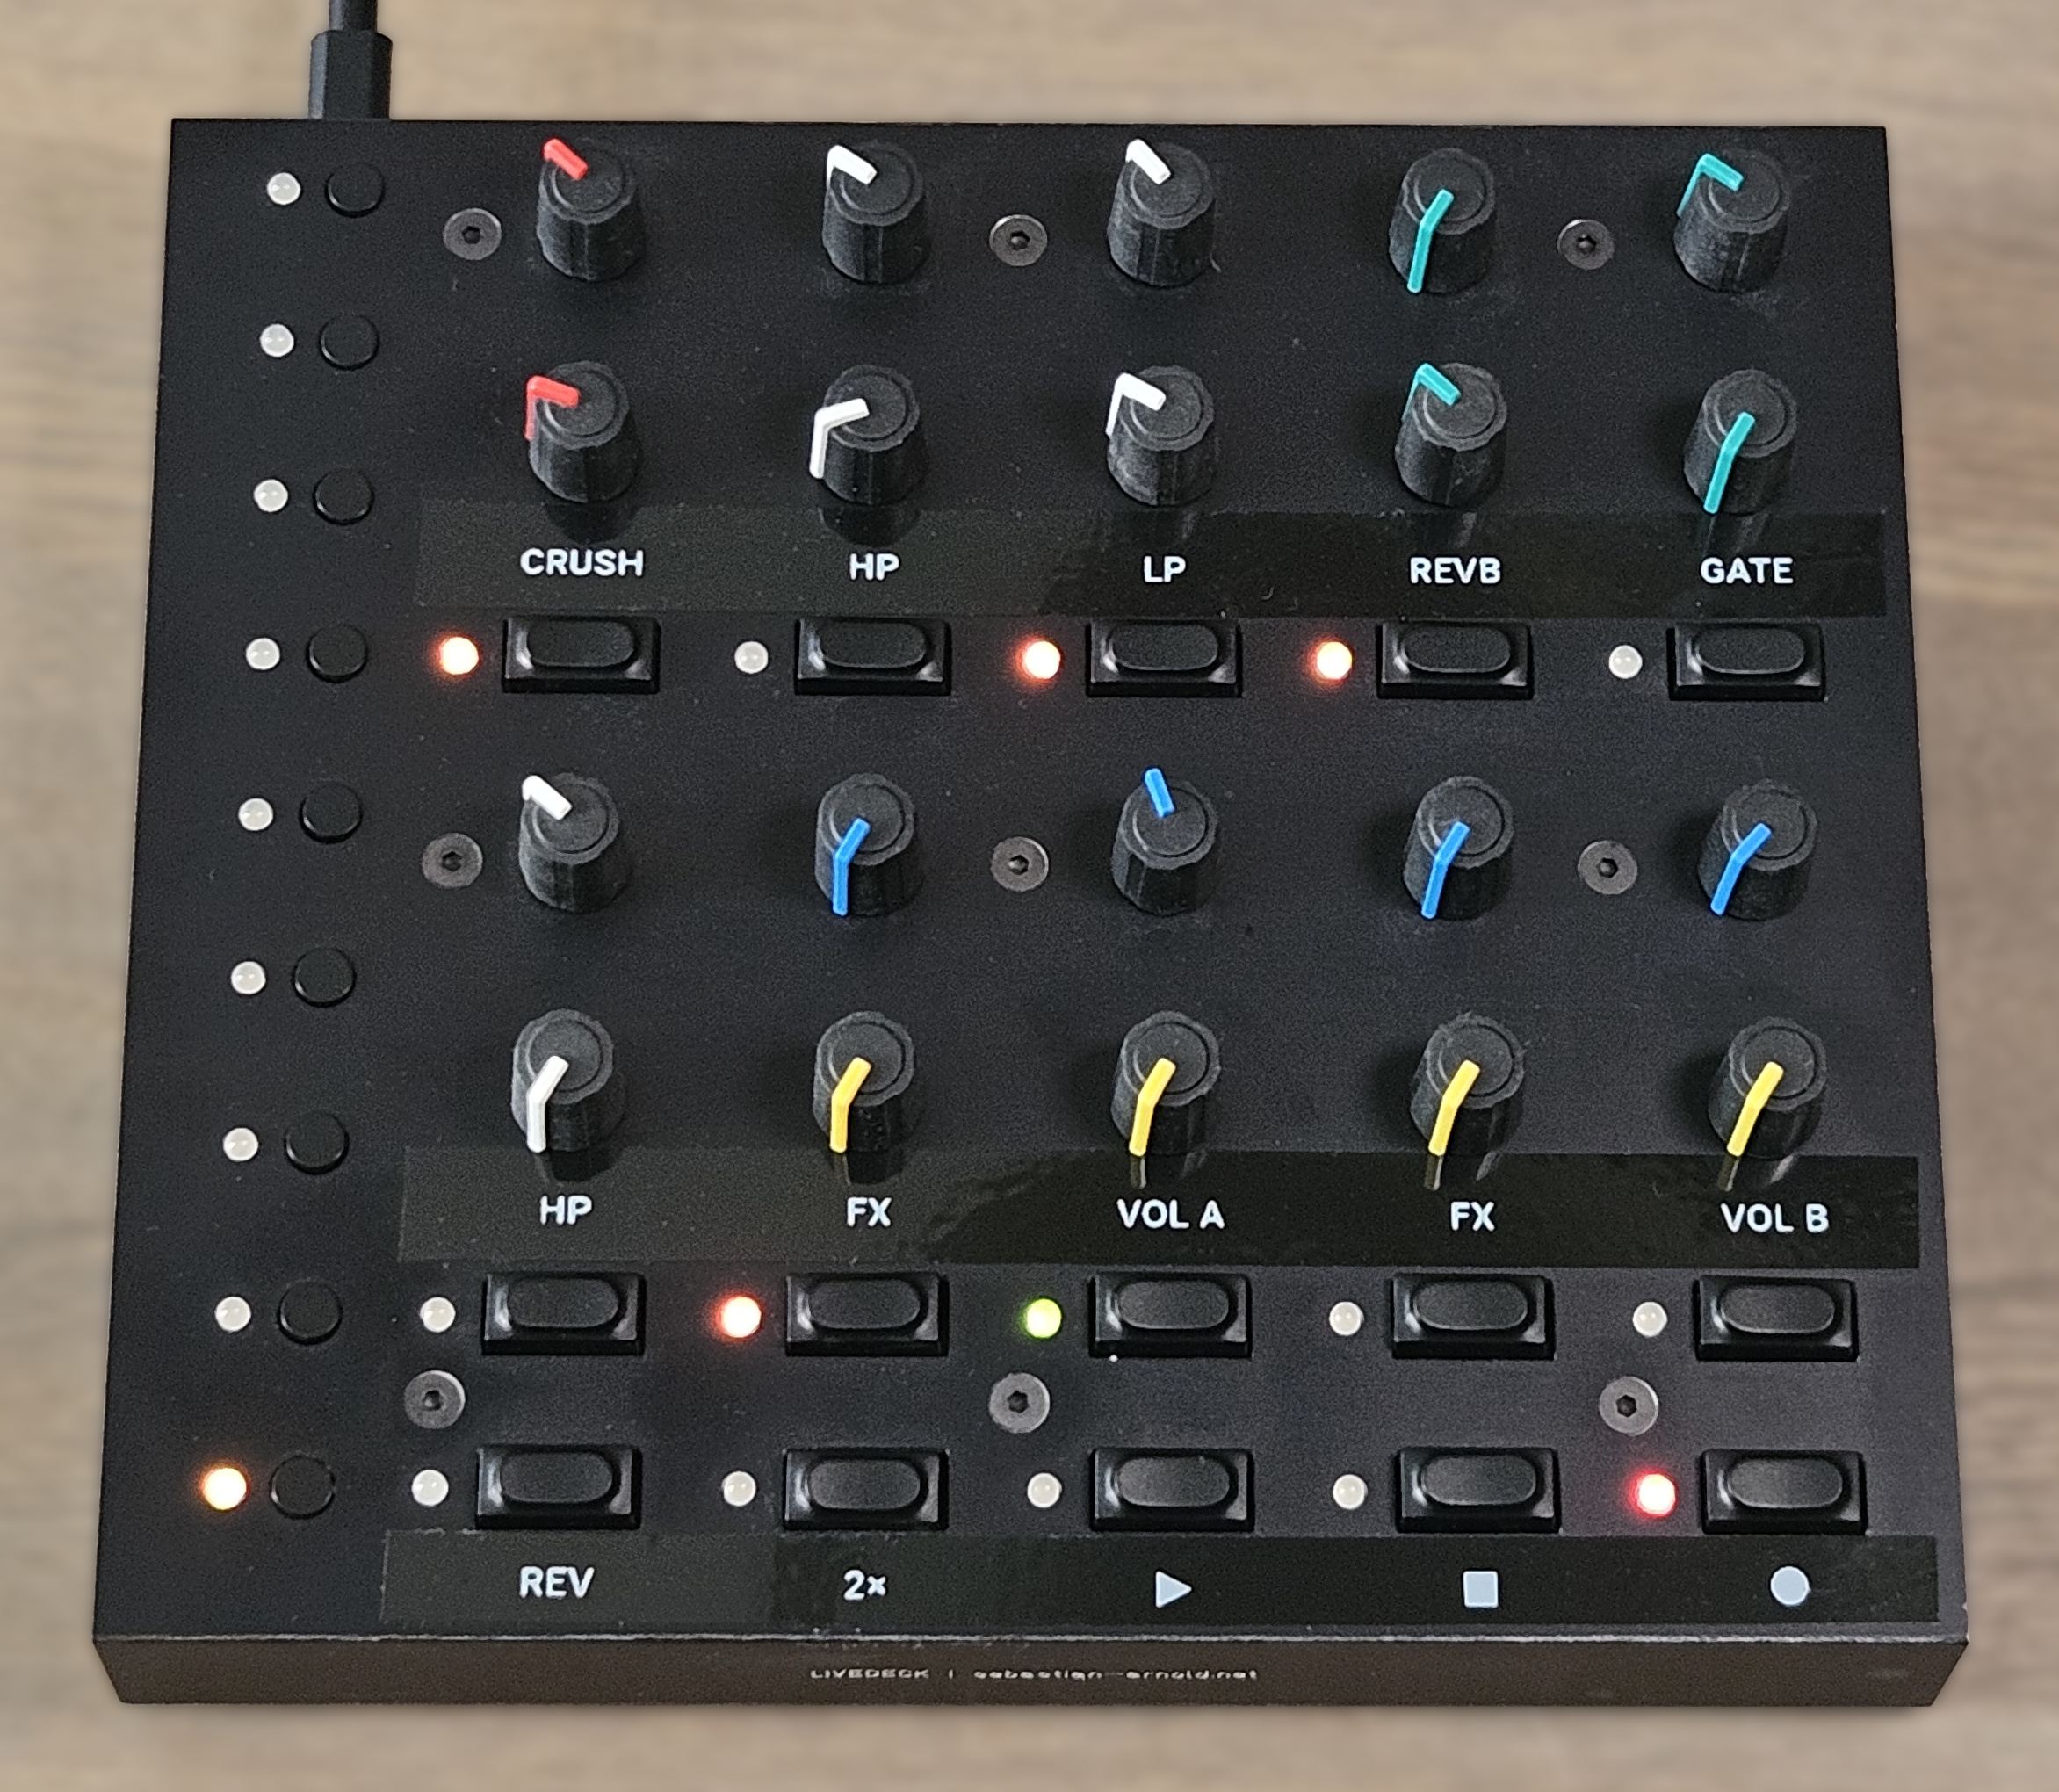
The Livedeck Controller has a prominent place in my Live Set to my left, where I'm using it to control two electronic instruments. The top row is controlling the effects for my electronic drums (Elektron Syntakt triggered by drum pads and the Nord Modular G2 Engine as the effects unit) – saturation and bit crush, highpass and lowpass filters, reverb and gates. The lower section is dedicated to control the excellent Loopy Pro iPad App – two independent loops with rec/dub, play, stop, reverse and doubletime buttons, and knobs to control volume and effects of each slot.